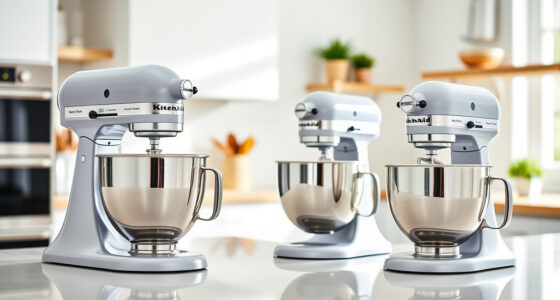

Getting your new KitchenAid Artisan Series 5 Quart Tilt Head Stand Mixer ready for action is straightforward when you follow a clear, step-by-step process. Proper setup ensures safe operation and optimal performance, helping you enjoy baking and cooking with confidence. In this guide, we’ll walk you through the assembly, initial use, and some troubleshooting tips so you can make the most of your mixer from day one.

Get baking supplies delivered free with Prime
- Fast, free delivery on millions of items
- Prime Video, Amazon Music and more included
- Member-only deals all year
Before starting, ensure you have all the components, including the mixer, bowl, and attachments, and that your workspace is clean and dry. Safety is paramount, so always handle the mixer and attachments carefully, and avoid overloading the motor with excessive ingredients or incompatible accessories.
Key Takeaways
| Easy assembly | Follow simple steps to assemble your mixer securely. |
| Attachment compatibility | Use only approved KitchenAid attachments for best results. |
| Safety first | Ensure the mixer is off and unplugged during setup. |
| Proper bowl placement | Place the bowl correctly on the base for stability. |
| Initial testing | Test the mixer with a small batch before heavy use. |
Unboxing and Inspecting Your Mixer
Begin by carefully removing your KitchenAid Artisan Series 5 Quart Tilt Head Stand Mixer from its packaging. Check all components against the included parts list, which typically includes the mixer body, stainless steel bowl, pouring shield, and various attachments. Inspect each part for any shipping damage or defects. Make sure the power cord is intact and the mixer’s finish is free of scratches or dents. Proper inspection prevents delays during setup and ensures your mixer is ready for safe use.
Positioning and Preparing Your Mixer
- Place the mixer on a stable, flat surface near an electrical outlet. Ensure the area is dry and clear of obstructions.
- Lift the tilt-head mechanism by gently pulling back the head lock lever. This will allow you to access the mixing bowl and attachments.
- Position the stainless steel bowl onto the base, aligning it with the fitment points. Turn the bowl slightly if needed to ensure it clicks or sits securely in place. The bowl’s comfortable handle should be accessible for easy handling.
Double-check that the bowl is locked into position before proceeding. This stability is crucial for safe operation, especially when mixing heavy doughs or multiple ingredients.
Attaching Accessories and Starting Your Mixer
- Select the appropriate attachment for your task—flat beater, wire whip, or dough hook—and align it with the attachment hub on the mixer head.
- Push the attachment into the hub until it clicks into place. For added security, ensure it is firmly attached.
- Lower the tilt-head back down and lock it securely into place using the lock lever.
- Plug in the mixer, set the speed to low (speed 1 or 2), and gently turn it on to verify proper attachment and operation.
Always start at a low speed to prevent ingredients from splattering and to avoid unnecessary strain on the motor. Gradually increase speed as needed for your recipe.
Testing and Troubleshooting Common Issues
Before tackling your full recipe, perform a test run with a small batch of ingredients. If the mixer runs smoothly, you’re ready to begin baking. If you encounter issues such as unusual noises, vibrations, or the mixer not turning on, check the following:
- Ensure the mixer is plugged in securely.
- Verify that the attachment is properly connected.
- Confirm the tilt-head is fully locked in place.
- Inspect for any obstructions or debris around the attachment hub or bowl.
If problems persist, consult the user manual or contact customer support for further assistance. Regular maintenance, such as cleaning the attachments and ensuring the mixer’s vents are unobstructed, will prolong its lifespan and performance.
Cleaning and Maintenance Tips
After use, turn off and unplug the mixer before cleaning. The stainless steel bowl and pouring shield are dishwasher safe, making cleanup easy. Attachments should be washed with warm soapy water and dried thoroughly. Wipe the mixer body with a damp cloth—avoid abrasive cleaners or submerging the unit in water.
Regularly check the power cord for damage and store attachments in a dry, organized space. Proper care ensures your KitchenAid mixer continues to operate effectively for years to come.
The Products in This Guide

KitchenAid Artisan Series 5 Quart Tilt Head Stand Mixer
- ✔ Voltage: 120V
- ✔ Warranty: 1-year limited
- ✔ Country of Origin: USA

KitchenAid Stand Mixer Attachment
- ✔ Power Use: Powered by stand mixer
- ✔ Storage: Included storage case
- ✔ Warranty: N/A
KitchenAid Artisan Series 5 Quart Tilt Head Stand Mixer
The KitchenAid Artisan Series 5 Quart Tilt Head Stand Mixer is built with durable metal construction and offers 59 touchpoints for thorough mixing. Its tilt-head design provides easy access to the bowl, making it simple to add ingredients and change attachments. With 10 speeds and a 5-quart stainless steel bowl, it handles small and large batches with ease. Perfect for versatile baking tasks, this mixer combines performance with style, available in over 20 colors.
Pros:
- Durable metal construction
- Easy tilt-head design for access
- 10-speed settings for all tasks
- Large 5-quart bowl for big batches
Cons:
- Heavy, may be difficult to move
- No included attachments for grinding or pasta
- Price may be high for budget buyers
Best for: Home bakers and cooking enthusiasts seeking reliable performance
Not ideal for: Users needing multiple attachments like grinders or pasta makers without purchasing separately
Bottom line: A durable, stylish mixer perfect for all baking needs, with easy access and thorough mixing capabilities.
KitchenAid Stand Mixer Attachment
The KitchenAid Metal Food Grinder attachment transforms your stand mixer into a versatile food processing station. Its sturdy construction and multiple grinding plates make it ideal for meat, vegetables, and more, saving you time and enhancing your homemade dishes.
Pros:
- Compatible with all KitchenAid stand mixers
- Includes multiple grinding plates
- Large food tray for efficiency
- Easy to clean and store
Cons:
- Additional purchase required
- Requires pre-chilling for best results
- Attachment may take up storage space
Best for: Home cooks wanting fresh ground ingredients regularly
Not ideal for: Those only interested in baking without grinding needs
Bottom line: Enhance your kitchen with this durable, versatile food grinder attachment.
Frequently Asked Questions
How do I attach accessories to my KitchenAid stand mixer?
Align the attachment with the hub on the mixer head, push in until it clicks, then lock the tilt-head into place. Always ensure the mixer is unplugged during attachment.
Can I use other brands of attachments?
No, only attachments designed specifically for KitchenAid stand mixers are guaranteed to fit and work properly.
How do I clean the mixer and attachments?
Wash the stainless steel bowl and attachments with warm, soapy water. Wipe the mixer body with a damp cloth and avoid submerging it in water.
What should I do if the mixer doesn’t turn on?
Check that it is plugged in properly, the power outlet is working, and the tilt-head is fully locked in place. If issues persist, contact customer support.
Can I make large batches with this mixer?
Yes, the 5-quart bowl allows you to mix up to 9 dozen cookies or large bread doughs comfortably.
Enjoy Seamless Baking with Your KitchenAid Mixer
Setting up your KitchenAid Artisan Series 5 Quart Tilt Head Stand Mixer is simple when following these steps. Proper assembly and initial testing ensure safe operation and optimal results. With its durable build and versatile features, this mixer will be a reliable companion for all your baking adventures. Remember to handle attachments carefully, keep your mixer clean, and consult the manual for troubleshooting. Happy baking!
Affiliate disclosure: As an Amazon Associate we earn from qualifying purchases. Prices and availability are accurate as of the time of publishing.
Halloween Picks
halloween
As an affiliate, we earn on qualifying purchases.