TL;DR

Get baking supplies delivered free with Prime
- Fast, free delivery on millions of items
- Prime Video, Amazon Music and more included
- Member-only deals all year
Halloween-themed ice cream bowls turn an ordinary scoop into a playful party dessert, especially when you match the bowl material and size to your guests. Choose food-safe, washable bowls, keep ice cream at 0°F (-18°C) or colder until serving, and use edible decorations rather than attaching non-food items to the rim.
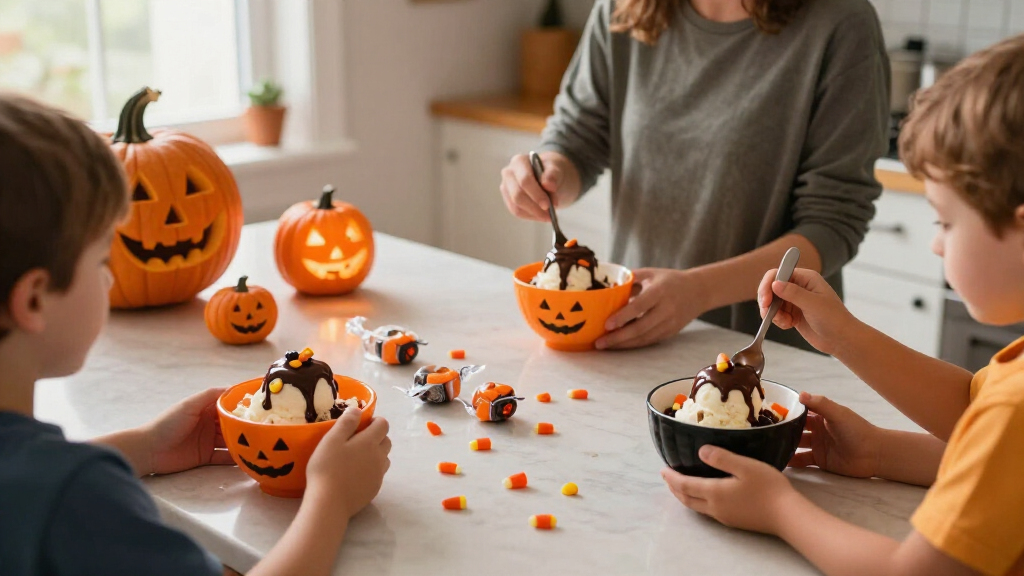
A scoop of vanilla can become a ghost, a monster, or a tiny haunted house before anyone takes a bite. The secret isn’t fancy equipment: it’s a well-chosen Halloween-themed ice cream bowl, a few colorful toppings, and a serving plan that keeps the ice cream cold.
Whether you’re hosting a classroom party, handing out dessert after trick-or-treating, or making a quiet October night feel festive, the right bowl can do more than look cute. You’ll learn how to choose safe, practical materials, style bowls for different ages, and keep your toppings and frozen treats easy to serve.
There’s no single perfect bowl for every gathering. A reusable ceramic set may suit a family dinner, while lightweight plastic or paper bowls can make cleanup easier for a crowd. Think of the bowl as the stage: it should show off the dessert, hold up to the occasion, and never steal the safety spotlight.
Choose bowls by guest age and occasion: sturdy reusable ceramic for family traditions, lighter options for busy children’s parties.
An 8- to 12-ounce bowl usually fits a scoop or two with toppings without overwhelming a small serving.
Check food-contact labels, care instructions, and condition; don’t use bowls with cracks, peeling finishes, or loose decorations.
Keep ice cream at 0°F (-18°C) or colder until serving, and bring out small batches rather than leaving tubs on the table.
Keep craft decorations outside the bowl and label common allergens such as milk, peanuts, tree nuts, soy, wheat, and eggs.
Choose a Bowl That Looks Spooky and Works for Your Party
Halloween-themed ice cream bowls work best when their decoration, size, and material fit the people eating from them. Look for familiar motifs—pumpkins, ghosts, bats, and skeletons—in orange, black, purple, green, or white, but check that the bowl still feels comfortable to hold and easy to wash. A design that looks dramatic on a shelf may be less useful if it has a narrow opening, a slippery finish, or raised details that trap melted ice cream.
For a family of four, a set of sturdy ceramic bowls can become part of your October tradition: the same smiling ghost bowl appears each year, while the kids argue over who gets the orange pumpkin. The weight and reusable nature can make ceramic feel special, but it also means breakage is a consideration around young children. For a classroom of twenty, lightweight bowls may be easier to carry and less stressful if one slips off a table. This is where style meets real life; a delicate 3D spider handle may look striking but can snag sleeves, make stacking awkward, or create a part that is harder to clean.
Size matters, too. An 8- to 12-ounce bowl usually leaves room for a scoop or two and a few toppings without swallowing a small portion. That range is a useful starting point, not a serving rule: a child may need less, while a sundae with several toppings needs extra room. If you plan to serve generous sundaes with sauce, cookie crumbs, and gummy worms, choose a wider bowl rather than a very deep one. A broad rim gives decorations space and makes it easier for younger guests to scoop without bumping their spoon against steep sides.
Designs typically feature seasonal characters and bold colors, but the best choice depends on your setting. A glow-in-the-dark finish can add fun at a dim party, though you should confirm that the product is intended for food contact and follow its care instructions. A comprehensive Halloween-themed ice cream setup might include matching spoons and a tray, but extra accessories add storage and washing work. Treat those extras as decoration, not a substitute for checking the bowl’s food-use label; prioritize a comfortable, easy-to-clean bowl if you’ll be serving many guests.
Products Worth Considering

KitchenAid Artisan 5-Quart Tilt-Head Stand Mixer, KSM150PS, Almond Cream

Instant Pot Pro 8 Qt 10-in-1 Electric Pressure Cooker, Black

Cuisinart Deep Fryer, 4 Quart, CDF-200P1
As an affiliate, we earn on qualifying purchases.
Compare Bowl Materials Before You Buy
The best bowl material depends on whether you value durability, low weight, easy cleanup, or a single-use option for a large event. Ceramic feels substantial and often looks polished, while reusable plastic or melamine is lighter and less likely to shatter if a child drops it. These benefits involve tradeoffs: a material that is convenient for carrying may have different care limits, and a disposable bowl saves washing but creates waste.
| Material | Best for | What to check |
|---|---|---|
| Ceramic | Family dinners and reusable sets | Dishwasher and microwave instructions; chips or cracks |
| Plastic or melamine | Kids and busy parties | Food-contact labeling; whether it is dishwasher-safe |
| Silicone | Flexible, lightweight serving | Food-grade labeling and washing instructions |
| Paper or compostable options | Large gatherings and quick cleanup | What local facilities accept; resistance to leaks |
Imagine serving a dozen children in a backyard. A stack of lightweight bowls may beat ceramic for carrying, but disposable packaging creates more waste and can soften if a sundae sits too long. Reusable bowls take washing, yet a durable set can return every October and may be the better choice if you have time and space to clean it. Eco-friendly labels also need a careful read: bamboo-based or compostable claims don’t automatically mean a product belongs in your home compost or local collection bin. If the local facility does not accept the item, the label may not translate into a practical waste reduction.
Before buying, check the maker’s instructions and look for food-contact safety information. A dishwasher-safe label matters if you’re serving a crowd and want to avoid hand-washing, while a microwave rating may be irrelevant for ice cream but useful for other family meals. Avoid bowls with peeling coatings, sharp edges, cracks, or decorations that can come loose, since damage can make a bowl harder to clean or unsafe to use. If you use a product with a novelty finish, don’t assume it can go in the dishwasher or microwave; follow the label. For a budget-minded host, basic bowls around $5 may work for a one-night gathering, while premium ceramic or designer sets can run roughly $20 to $50, depending on the set and seller. Compare the price with how often you expect to reuse the bowls: paying more can make sense for a durable set, but not if the design is difficult to store or wash.
Build a Halloween Sundae That Looks Great in the Bowl
A Halloween sundae looks most inviting when you add toppings in layers and keep the edible decorations on the dessert, not dangling from the bowl. Start with a scoop, add one contrasting sauce, then finish with a small number of clear accents such as candy eyes, cookie crumbs, or gummy worms. Limiting the number of elements helps each spooky detail stand out and keeps the bowl easier to eat; too many toppings can hide the ice cream and make a small serving messy.
For a ghost bowl, try vanilla ice cream with two chocolate chips pressed into the front and a little whipped cream for a wisp of “sheet.” In a pumpkin bowl, orange sherbet or vanilla with orange sprinkles makes a bright, simple match. A purple bowl can carry a “monster mash” of chocolate ice cream, crushed cookies, and one gummy worm curling over the top. The color contrast makes the dessert easy to recognize before the first spoonful. It also gives you a simple way to create a coordinated look without buying specialty molds or adding non-food decorations to the bowl.
Use this quick serving sequence when guests are waiting:
- Pre-chill the bowls for 10 to 15 minutes if you have freezer space; colder bowls can slow melting briefly, though they cannot replace keeping the ice cream frozen.
- Set out small topping dishes with serving spoons, keeping sticky sauces separate from dry sprinkles so guests can serve them neatly.
- Scoop the ice cream just before serving, then add one or two toppings. This keeps the dessert from sitting out while you assemble everyone’s bowls.
- Offer an allergy-aware option and keep its spoon and toppings separate, reducing the chance of cross-contact.
Small choices prevent a topping bar from turning into a traffic jam. For example, put the gummy worms and candy eyes at the end of the table, so children first choose a bowl and flavor. If you serve toppings containing common allergens—such as peanuts, tree nuts, milk, soy, wheat, or sesame—label them clearly and use separate utensils. Separate dishes help, but they do not guarantee an allergen-free serving if spoons or hands move between them, so make the arrangement easy to follow and supervise younger guests. Edible glitter should be specifically labeled edible; craft glitter is not food.
Keep Ice Cream Cold and Decorations Food-Safe
Keep ice cream at 0°F (-18°C) or colder until you’re ready to serve, and return the tub to the freezer promptly after scooping. At a party, this simple habit matters more than a clever bowl design: as ice cream warms, it softens and loses its shape, while a tub left out for a long time may no longer be suitable to serve. A well-planned serving order reduces both melting and the time guests spend waiting.
Instead of setting every flavor on the table, keep tubs in the freezer and bring out one at a time. If you’re serving several guests, scoop into pre-chilled bowls in small batches, then hand them out. Don’t leave a tub sitting out while everyone chooses toppings; let guests decide before you bring out the ice cream. If the ice cream has softened, refreeze it only if it has stayed safely cold and the product directions allow it; when in doubt after prolonged warm exposure, discard it rather than serving it. Refreezing does not reverse unsafe handling and can also affect the texture, so minimizing time out of the freezer is the better plan.
Keep bowls and spoons clean, and don’t let guests share tasting spoons between flavors. A child with a milk allergy, for instance, needs more than a “dairy-free” label on one tub: check ingredient and allergen statements, use a clean scoop, and serve it in a clean bowl away from other toppings. This matters because a small amount transferred from a shared utensil can undermine the care taken in choosing a suitable product. Common allergens in ice cream and toppings include milk, peanuts, tree nuts, soy, wheat, and eggs.
Skip dry ice in bowls or near food unless you have expert handling instructions and a setup designed for it. It can cause severe cold burns and should never be swallowed; fog effects aren’t worth putting guests at risk. For a safe spooky look, use a dark serving tray, battery-powered lights placed away from food, or a few paper bats behind the dessert table. These create atmosphere without adding a cold-contact hazard or anything guests might mistake for an edible decoration. Let the bowls create the Halloween mood while the food stays simple and properly chilled.
Make a DIY Bowl Display Without Unsafe Decorations
You can give plain bowls a Halloween look without painting or gluing decorations onto the food-contact surface. Keep stickers, paint, plastic spiders, and craft materials on the outside only—and only if the product and decoration can stay securely attached without touching food or becoming a choking hazard. The distinction matters because materials intended for crafts may not be tested for contact with food, and loose pieces can end up in a serving or be swallowed.
For a quick family project, set out plain bowls and use removable stickers on the exterior. Let children add their names and draw a face on a paper tag tied around the bowl’s base, then remove the tag before washing. If you want a more polished display, place each bowl on a colored napkin and add paper cutouts to the table rather than the dish itself. A black napkin under an orange bowl gives you a dramatic contrast with no extra food-contact concerns. Removable decorations also make it easier to wash and reuse the bowls after the party instead of leaving adhesive residue behind.
Some customizable kits invite families to decorate their own bowls, and 3D-printed or glow-effect designs can add visual flair. Treat these as products that need label checks, not automatic food-safe choices. Confirm that the surface is intended for food contact, follow cleaning directions, and avoid using a bowl if the finish is cracked, peeling, or hard to clean. Raised patterns and textured finishes can look festive but may collect residue, so consider whether you can clean them thoroughly. A painted craft bowl may be a charming candy holder, but it shouldn’t serve ice cream unless its maker specifically says it is safe for that use.
Here’s a practical example: for a six-child sleepover, put a different paper name card beside each bowl and let everyone choose a face sticker for the outside. You get personalized keepsakes without covering the rim or interior. The bowl still does its job, the decorations stay out of the dessert, and cleanup takes minutes rather than a scrub brush and guesswork. If a sticker begins to lift or a child puts it near the rim, remove it before serving; a simple paper card beside the bowl is an easy backup.
Plan a Dessert Station That Keeps the Party Moving
A good Halloween dessert station lets guests choose a bowl, flavor, and a few toppings without crowding the freezer or sharing utensils. Arrange the setup in one direction—bowls first, ice cream next, toppings last—so each person moves forward instead of reaching over someone else’s sundae. This layout also separates clean bowls from used spoons and reduces the chance that guests crowd around an open freezer.
For a small kitchen, place bowls on a tray near the table and keep the ice cream in the freezer until the moment you need it. Set out two or three toppings in shallow dishes rather than every candy in the pantry. A family hosting trick-or-treaters might offer vanilla and chocolate, then put out sprinkles, crushed cookies, and a separate nut-free topping. Fewer choices mean less waiting and less time with the freezer door open; they also make it easier to keep track of which utensils belong with which ingredient.
If you’re planning a larger party, use a simple label beside each flavor and topping. Mark common allergens plainly, and give any allergy-aware option its own clean scoop and serving area. Labels help guests make informed choices, but they cannot prevent cross-contact on their own, so keep the serving tools separate and remind guests not to switch them. Keep a spare stack of bowls nearby so guests don’t reuse a dish. Put a small bin or wash tub at the far end for used spoons, which keeps them away from clean serving tools.
Reusable bowls make sense when you have a sink, dishwasher, and time to wash them; disposable options can reduce immediate cleanup at a crowded event but create more waste. Neither choice is right for every party. Consider how many guests you have, whether you can collect and wash bowls promptly, and whether your disposable option is accepted by local waste facilities. The best arrangement is the one that keeps food cold, separates clean and used items, and lets your guests enjoy dessert without a queue stretching past the front door.
Frequently Asked Questions
Where can I buy Halloween-themed ice cream bowls?
Check home-goods stores, party-supply shops, major online retailers, and seasonal aisles during September and October. Read the product description for food-contact use, size, and washing instructions before ordering a novelty design.
Are Halloween-themed bowls safe for children?
They can be, if the bowl is labeled for food use, has no sharp edges or loose parts, and suits the child’s age. For younger children, choose a stable, lightweight bowl and keep small decorations such as candy eyes or plastic spiders out of reach unless they are being used safely as food or table décor.
How can I decorate plain bowls for Halloween?
Use removable stickers or paper name tags on the outside only, away from the rim and interior. Don’t use craft paint, glue, or glitter on a food-contact surface unless the product is specifically made and labeled for that purpose.
How do I keep ice cream from melting during a party?
Store it at 0°F (-18°C) or colder, keep tubs in the freezer, and serve one flavor at a time in small batches. Pre-chilled bowls can help the scoops hold their shape, but they don’t replace proper freezer storage.
What toppings work well for Halloween ice cream bowls?
Try cookie crumbs, orange or purple sprinkles, chocolate chips, gummy worms, or candy eyes for easy spooky details. Keep toppings in separate dishes with separate spoons, and clearly identify common allergens such as nuts, milk, soy, wheat, and eggs.
Can I reuse Halloween ice cream bowls next year?
Yes, if the bowls remain in good condition and the maker’s care instructions allow repeated use. Wash them as directed, dry them fully before storing, and check for cracks, chips, or peeling decorations before the next Halloween.
Conclusion
Choose a Halloween bowl that’s fun to look at, comfortable to use, and clearly safe for food. Then keep the ice cream cold, offer a few well-chosen toppings, and let the colors do the spooky work.
A smiling ghost filled with chocolate and cookie crumbs can make an ordinary October evening feel like a tiny celebration. Pick your bowl, chill your scoop, and give the first one to the person who’s been waiting longest.