If you’re looking to craft your own waffle cutter at home, I’ve got some great guides to recommend. Focus on material selection like stainless steel for durability, consider dimensions for perfect waffle sizes, and think about easy cleaning features. Customization can save you money too! Plus, you’ll enjoy the satisfaction that comes from making something yourself. Stick around to discover more tips and techniques to make your DIY project a success!
Key Takeaways
- Look for guides emphasizing durable materials like stainless steel for a long-lasting waffle cutter.
- Ensure the guides provide dimensions suitable for standard waffle sizes (7-8 inches round).
- Choose guides that highlight safety features, including sharp blades with protective covers and non-slip bases.
- Opt for designs that include non-stick surfaces and removable parts for easy cleaning.
- Select guides that focus on cost-effectiveness by using available materials and allowing customization.
Easy Step-by-Step Guide to Perfect Dressmaking Handbook

If you’re just starting out in the world of sewing and feel overwhelmed by the thought of dressmaking, the “Easy Step-by-Step Guide to Perfect Dressmaking” is the perfect resource for you. This handbook simplifies everything, offering illustrated, black-and-white images alongside straightforward instructions. I found it incredibly helpful, especially as a beginner with no prior sewing experience. While some might think it’s too basic, I appreciated how it laid the foundation for essential techniques. Whether you’re looking for a quick overview or a detailed guide, this book equips you to access your sewing potential effortlessly. Happy sewing!
Best For: Beginners with no prior experience in sewing who want to learn dressmaking techniques in a simple and straightforward manner.
Pros:
- Illustrated guide with black-and-white images makes complex concepts easier to understand.
- Step-by-step instructions cater specifically to novice sewers.
- Provides a solid foundational resource for mastering dressmaking techniques.
Cons:
- Some readers may find the content overly basic or simplistic.
- May not offer advanced techniques for more experienced sewers.
- Limited color visuals could be less engaging for some users.
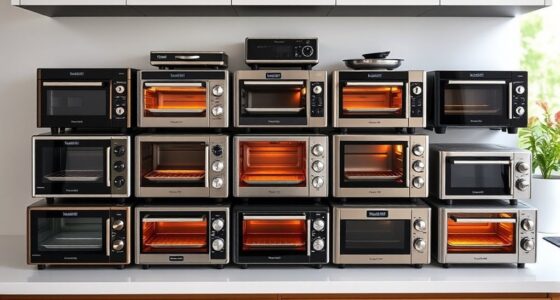
Waffle Maker, Mini Electric Double-Head Honeycomb Waffle Machine
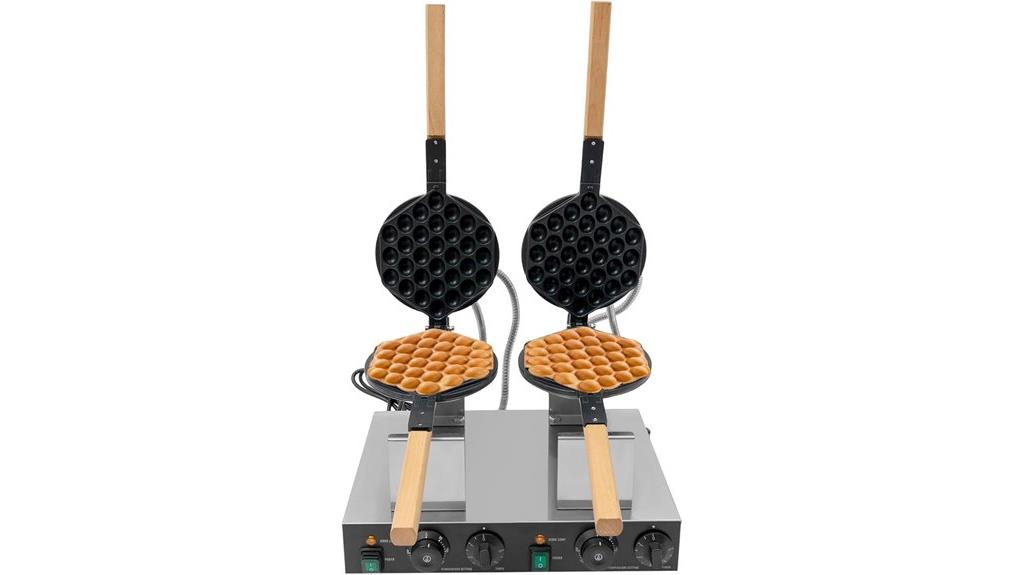
The Mini Electric Double-Head Honeycomb Waffle Machine is perfect for anyone who loves making waffles at home or in a commercial setting. With its dual pans, I whip up delicious waffles in no time, thanks to the 180° rotary heating that guarantees even cooking. Its stainless steel construction not only looks sleek but is also durable. I love the adjustable temperature and timer settings, making it easy to customize my waffles. Plus, the non-stick coating means cleanup’s a breeze. Just preheat, pour in the batter, and enjoy perfect waffles in minutes—it’s that simple!
Best For: Home cooks and commercial chefs looking for a reliable and efficient waffle-making solution.
Pros:
- Dual pans allow for simultaneous cooking, saving time when preparing multiple waffles.
- Adjustable temperature and timer settings provide customization for perfect waffle results.
- Non-stick coating makes for easy cleanup after use.
Cons:
- May take longer to preheat initially compared to some other waffle makers.
- Heavier design (9 kg) may be cumbersome for some users to handle.
- Requires careful maintenance to avoid damage to the non-stick surface.
110V Mini Waffle Maker, Electric Non-Stick Waffle Baker
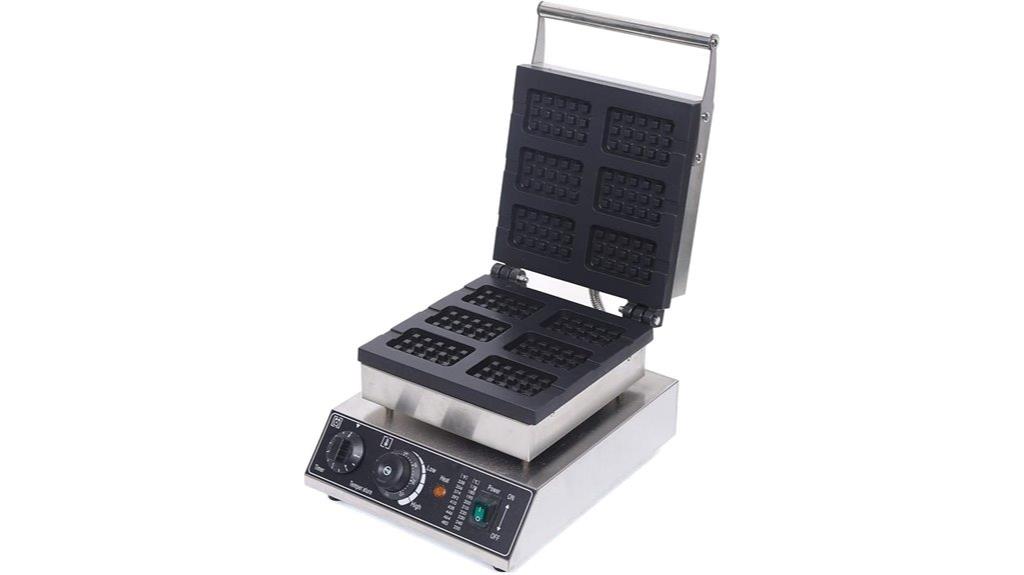
For anyone looking to elevate their waffle-making game, the 110V Mini Waffle Maker stands out with its precise timer and adjustable temperature control. With a power of 1500W, this electric non-stick waffle baker makes six mini waffles at once, perfect for sharing. The Teflon-coated surface guarantees easy cleanup and perfect shaping, while the stainless steel body assures durability. I love the customizable temperature range from 50-300°C, allowing me to achieve that ideal crispy outside and soft inside. Plus, its sturdy design with heat dissipation keeps me safe while I enjoy delicious homemade waffles anytime!
Best For: This product is best for home cooks, bakers, and small businesses looking to make delicious mini waffles quickly and efficiently.
Pros:
- Easy to Use: The precise timer and adjustable temperature control make it simple to achieve perfect waffles every time.
- Durable Construction: Made with a stainless steel body and cast aluminum molds, ensuring long-term use.
- Non-Stick Surface: Teflon coating allows for easy cleaning and prevents waffles from sticking.
Cons:
- Weight: At 9.5 kg (21 pounds), it may be too heavy for easy portability.
- Limited Waffle Size: The mini waffle molds may not satisfy those looking for larger waffle options.
- Power Requirement: Requires a 110V outlet, which may limit use in some locations.
Waffle Maker, 1750W Round Non-Stick Waffle Iron

Looking to whip up delicious, thick waffles effortlessly? The 1750W Round Non-Stick Waffle Iron is a game changer! With the capacity to make four thick waffles in just minutes, it’s perfect for family breakfasts or brunch gatherings. I love the adjustable temperature control, allowing me to customize my waffle cooking from 122-572℉. Plus, the non-stick cast aluminum surface makes cleanup a breeze. It even includes handy tools like a food clip and egg-beater. Compact and durable, this waffle maker makes my kitchen adventures enjoyable and stress-free. You won’t regret adding this essential appliance to your home!
Best For: Families, brunch lovers, and anyone who enjoys hosting gatherings with delicious homemade waffles.
Pros:
- Quick Cooking: High power at 1750W allows for fast waffle preparation in just minutes.
- Customizable Cooking: Adjustable temperature control from 122-572℉ enables personalized waffle textures and browning.
- Easy Cleanup: Non-stick surfaces and included cleaning tools make maintenance simple and hassle-free.
Cons:
- Weight: At 24.3 lbs, it may be heavier and less portable than other waffle makers.
- Size: The compact size may not accommodate larger batches for bigger gatherings without multiple uses.
- Limited Cooking Timer: The timer only goes up to 5 minutes, which may not be sufficient for all preferences.
Factors to Consider When Choosing a DIY Guide: Making Your Own Waffle Cutter

When I’m choosing a DIY guide for making my own waffle cutter, I always consider a few key factors. Material selection is essential for durability, while dimensions guarantee my waffles come out just right. Plus, I can’t overlook safety features, ease of cleaning, and compatibility with my waffle maker.
Material Selection for Durability
Choosing the right materials for your DIY waffle cutter is essential for guaranteeing its durability and performance. I recommend selecting high-quality stainless steel, which resists rust and corrosion, boosting longevity. If you’re aiming for a lightweight design, consider heavy-duty plastic or acrylic; they can withstand the pressure of cutting through waffle batter without compromising sturdiness. Non-stick materials, like Teflon-coated surfaces, make releasing your waffles easy and simplify cleanup. Additionally, verify your chosen material can handle high temperatures, ideally up to 572°F (300°C), as it’ll be exposed to heat during cooking. Finally, opt for reinforced aluminum to enjoy a combination of lightweight design and durability, ensuring your waffle cutter remains reliable after repeated use.
Dimensions for Perfect Waffles
Getting the dimensions right for your DIY waffle cutter is essential to crafting the perfect waffles. I’ve found that a standard waffle mold should ideally measure between 7 to 8 inches in diameter for round waffles. This size strikes a balance between thickness and cooking time. If you prefer mini waffles, aim for molds around 3 to 4 inches—these cook faster and make delightful bite-sized treats. For the batter, keep the thickness to about 1 inch to guarantee a fluffy interior with a crispy exterior. If you’re going for a honeycomb design, consider holes with a diameter of about 0.98 inches for a unique texture. Remember, precision in dimensions will help you cut your waffles into perfect portions without compromising their structure.
Safety Features to Consider
Safety features play an essential role in the design of your DIY waffle cutter, especially since you’ll be working with sharp tools and hot surfaces. First, make sure to use food-safe, non-toxic materials that won’t leach into your batter or cooked waffles. I recommend incorporating rounded edges and a sturdy handle to minimize the risk of accidental cuts or slips while cutting. If you’re using sharp blades, don’t forget to add a protective cover for safe storage. A non-slip base can be vital for keeping the cutter stable during use, reducing the chance of injury. Finally, I suggest creating a clear safety manual that outlines proper usage and maintenance, ensuring you stay safe while enjoying your waffle-making adventures.
Ease of Cleaning Design
After confirming your DIY waffle cutter is safe to use, it’s time to think about how easy it’ll be to clean. I recommend opting for a cutter with a non-stick surface, like Teflon coating, to help the batter release easily and minimize residue. A design featuring removable parts is also a game changer, as it allows for a thorough wash of each component. Look for smooth edges with no complex crevices—these can trap food and complicate cleaning. Additionally, consider models with built-in overflow channels to manage spills and reduce mess. If convenience is key for you, verify the materials are dishwasher safe, as this can make the cleaning process a breeze.
Compatibility With Waffle Makers
When you’re choosing a DIY waffle cutter, compatibility with your waffle maker is essential to guarantee a seamless cooking experience. First, check the dimensions of the waffles your maker produces. Different models yield varying sizes and shapes, so your cutter needs to align with that. Also, consider the thickness of the waffles; a cutter designed for thicker waffles must be sturdier to slice through without damaging them. If your waffle maker has multiple molds, verify the cutter can handle the number of waffles produced at once for efficient cutting. Finally, choose a material that’s safe for non-stick surfaces to avoid scratches, and look for a design that allows easy maneuverability and storage when not in use.
Cost-Effectiveness of DIY
Creating your own waffle cutter not only taps into your creativity but also offers significant cost savings. Instead of splurging on specialized tools, I found that I could use materials I already had at home, like wood or plastic, for just under $10. Plus, crafting a DIY cutter lets me customize the size and shape to suit my needs, eliminating the extra costs of pre-made products. I also avoid shipping fees that come with online orders, adding to my savings. Investing time in making a waffle cutter is far more cost-effective than repeatedly buying disposable or low-quality options that quickly wear out. Overall, it’s a win-win for both my wallet and my kitchen adventures!
Frequently Asked Questions
What Materials Are Best for Crafting a Waffle Cutter?
When I think about crafting a waffle cutter, I focus on durable materials that can withstand heat and pressure. I love using stainless steel for the cutting edges because it’s sturdy and easy to clean. I’ve also found that sturdy wood works well for the handle. You might want to add a non-slip grip for comfort while cutting. Overall, I believe these materials create an effective and enjoyable waffle-cutting experience.
Can I Use a 3D Printer for My Waffle Cutter Design?
Can you imagine the thrill of creating a custom tool? I’ve found that using a 3D printer for my waffle cutter design is not just possible, it’s exciting! The precision and creativity it offers can bring your ideas to life in a way that’s truly unique. Just make sure to choose the right materials for durability. Trust me; the results can be both functional and visually appealing, making every waffle experience special!
How Long Does It Take to Make a Waffle Cutter?
Making a waffle cutter can take anywhere from a couple of hours to a full day, depending on your design and materials. If I’m using a 3D printer, I might spend time on the design phase, which could also take a while. Once I have everything ready, the printing itself usually takes a few hours. Overall, it’s a fun project, but I like to plan for a bit of extra time just in case!
Are There Safety Tips for Using Homemade Kitchen Tools?
Did you know that nearly 60% of kitchen accidents happen while using homemade tools? When I create my own kitchen gadgets, I always prioritize safety. I make sure to use materials that won’t easily break or splinter, and I keep my workspace tidy to avoid slipping. Wearing protective gear, like gloves, is a must. I also double-check all edges for sharpness and handle my tools with care to prevent injuries.
What Common Mistakes Should I Avoid While Crafting a Waffle Cutter?
When crafting a waffle cutter, I’ve learned to avoid a few common mistakes. First, I don’t underestimate the significance of measuring accurately; uneven cuts can ruin the waffles. I also make certain to use durable materials to prevent breakage. It’s essential not to rush the assembly process, as this can lead to safety hazards. Finally, I always double-check for sharp edges to guarantee my cutter is safe to use.
Conclusion
To sum up, creating your own waffle cutter can be a fun and rewarding project. I know some might worry it’ll be too complicated, but with the right guide, you’ll find it’s simpler than it seems. Imagine this: a perfectly cut waffle, each piece ready to hold syrup and toppings. By following a DIY guide, you’ll not only save money but also get exactly the design you want. So, let’s get crafting and elevate your waffle game!