
To clean your waffle iron properly, start by unplugging it and letting it cool completely. Wipe away excess oil and crumbs with a dry paper towel. For stuck-on batter, apply a little cooking oil. Use a soft, damp cloth to clean the exterior, avoiding water in electrical parts. Regular maintenance is essential, so make it a habit to clean after each use. Interested in some deep cleaning techniques and tips for long-term care?
Key Takeaways
- Always unplug and cool the waffle iron before cleaning to ensure safety and prevent damage.
- Use a dry paper towel to remove excess oil and crumbs after each use.
- Apply cooking oil to stubborn batter spots for easier removal without damaging nonstick surfaces.
- For deep cleaning, create a baking soda paste and let it sit on stains before wiping clean.
- Regularly check the manufacturer’s instructions for specific cleaning recommendations and avoid using abrasive tools.

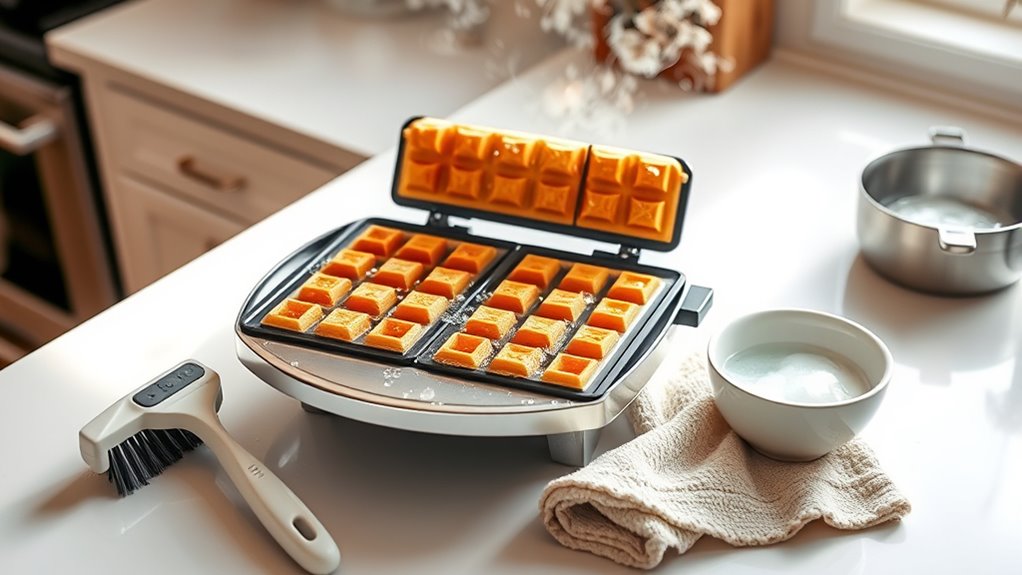
Cleaning your waffle iron mightn’t be the most exciting chore, but keeping it in top shape is crucial for great-tasting waffles. After each use, grab a dry paper towel to wipe away excess oil and crumbs. This quick step prevents buildup and keeps your waffles tasting fresh.
Always unplug the waffle iron and let it cool down completely before diving into the cleaning process. For stuck-on batter, apply a small amount of cooking oil to soften it, making removal easier. Ensure no water enters the electrical components to avoid damage during cleaning. Regular maintenance ensures your appliance remains in optimal condition, which can enhance its longevity. Regular cleaning can also help eliminate bacterial growth, ensuring a safe cooking surface. Additionally, monitoring your appliance’s performance can help you catch any underlying issues early on. Proper airflow around the unit is essential for maintaining efficiency during cooking. Using airless paint sprayers for quick and efficient cleaning of surfaces can be a time-saver as well.
Always unplug your waffle iron and let it cool completely before cleaning. Use cooking oil to soften stuck-on batter for easier removal.
Once cooled, use a soft, damp cloth to wipe the exterior. Steer clear of abrasive tools, as they can damage nonstick surfaces. Using the right cleaning tools is key—paper towels are perfect for absorbing oil, while microfiber cloths work wonders with a mild cleaning solution. If you need a deeper clean, a little dish soap mixed with water can do the trick.
If you’re dealing with stubborn stains or burnt-on food, consider making a baking soda paste. Mix baking soda with water, apply it to the affected areas, and let it sit for several hours. For an even more potent solution, try a mixture of baking soda and hydrogen peroxide.
Apply this paste to the grid surfaces, let it sit, and then wipe clean with a damp cloth to remove any residue. Make sure to allow the waffle iron to dry completely before storing it.
Maintenance is critical, so always check the manufacturer’s cleaning instructions for any specific advice. If needed, gently use a non-abrasive brush to remove food particles. Avoid sharp or metal tools that could scratch the surface.
Regular cleaning prevents buildup and bacterial growth, so clean your waffle iron after every use. A deeper clean every few uses helps eliminate excess oil, while a thorough cleaning before long-term storage is a must.
When it comes to grid cleaning, use a damp cloth to wipe away oil and food particles. A handy trick is to wrap a moistened paper towel around a chopstick to clean grid lines.
White vinegar can help dissolve oil, so don’t hesitate to apply it to a paper towel. Toothpicks are great for getting into small crevices where batter might get stuck. By regularly cleaning the grid, you’ll maintain its nonstick performance and enjoy perfect waffles every time.

Dash Mini Waffle Maker- Compact Electric Iron for Creative Homemade Treats - Nonstick Surface - Easy-to-Clean - Perfect for Kids & Families - Aqua
Mini Waffle Magic: The Dash Mini Waffle Makeris a compact, lightweight device that quickly creates delicious waffles with...
As an affiliate, we earn on qualifying purchases.
Frequently Asked Questions
Can I Use Metal Utensils on My Waffle Iron?
You shouldn’t use metal utensils on your waffle iron. They can scratch the non-stick coating, reducing its effectiveness and lifespan.
Instead, opt for plastic, silicone, or wooden utensils to protect the surface and keep your waffles from sticking. Metal utensils can also complicate cleaning and potentially lead to cross-contamination.
How Often Should I Clean My Waffle Iron?
You should clean your waffle iron after each use to remove food particles and prevent bacteria from growing.
If you don’t use it frequently, a deeper clean before storing is a must. Regular maintenance keeps the plates functional and prevents oil buildup.
If you notice any sticky surfaces or visible buildup, clean it immediately.
What Should I Do if My Waffle Iron Is Stuck?
If your waffle iron’s stuck, first unplug it and let it cool down.
Then, apply a bit of water or oil to soften the stuck bits. Use a wooden tool or stiff brush to gently pry them loose.
Afterward, wipe away any residue and make sure it’s clean before the next use.
To prevent this from happening again, always preheat the iron and grease it evenly before pouring in the batter.
Is It Safe to Soak My Waffle Iron in Water?
Soaking your waffle iron in water isn’t safe at all. It can cause electrical shock and damage to the appliance.
Instead, unplug it and let it cool down before cleaning. Use a damp cloth to wipe down the surfaces, avoiding any soaking.
Keeping the control panels and vent holes dry is essential for safe operation. If you notice any damage, get it repaired immediately before using it again.
Can I Use Vinegar for Cleaning My Waffle Iron?
Oh sure, why not use vinegar to clean your waffle iron?
It’s not like it’s an acidic powerhouse or anything!
In reality, vinegar’s acidity makes it great for breaking down food residue.
Just mix it with baking soda for tougher stains or dilute it for delicate surfaces.
Remember, always clean when it’s cooled down, and steer clear of abrasive scrubbers.

Cuisinart Waffle Maker, 1250W Round Classic Waffle Iron, 5-Setting Adjustable Browning Control, WMR-CANAS, Brushed Stainless
SUPERIOR FUNCTION: This Cuisinart Waffle Maker offers professional quality for home use, making delicious breakfast waffles fast and...
As an affiliate, we earn on qualifying purchases.
Conclusion
Cleaning your waffle iron doesn’t have to feel like a chore. Think of it as tuning a musical instrument; just as a clean guitar string produces a clearer sound, a well-maintained waffle iron makes for perfect waffles. So next time you whip up those golden treats, remember to give your appliance a little TLC afterward. With just a few simple steps, you’ll guarantee your waffles always hit the right note, deliciously crisp and ready to impress!

bella Flip-n-Store Waffle Maker with EverGood™ Ceramic Nonstick Coating, Fits-anywhere™ Kitchenware, Power Indicator Light, Cool Touch Handle & Cord Wrap, 7” Wide & 1" Deep Plates, 1000 Watt, Oatmilk
Diner-Style Waffles at Home: Craving those thick, fluffy diner-style waffles? The bella Flip & Store Waffle Maker delivers...
As an affiliate, we earn on qualifying purchases.
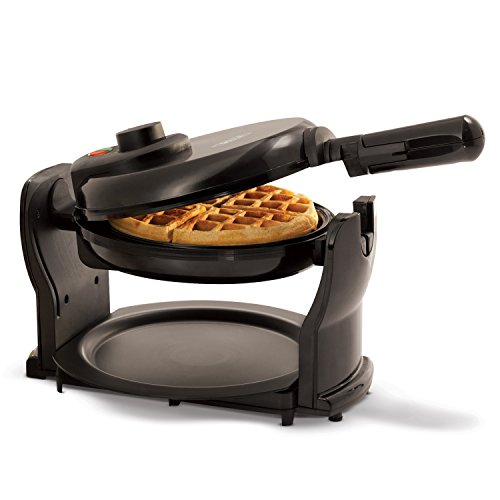
bella Classic Rotating Belgian Waffle Maker with Nonstick Plates, Removable Drip Tray, Adjustable Browning Control and Cool Touch Handles, Black
VERSATILE COOKING: With 3 different non-stick coatings, from traditional to ceramic titanium, this waffle iron allows you to...
As an affiliate, we earn on qualifying purchases.