
For perfect waffle cone batter, mix ingredients gently until just combined—avoid overmixing to keep it light and crispy. Use a preheated cone maker and pour the batter evenly to prevent uneven baking. Shape hot cones quickly around molds and work swiftly to keep them crisp. Store cooled cones in an airtight container to maintain freshness. To master flawless cones, keep reading for essential tips on batter consistency, shaping, and handling techniques.
Key Takeaways
- Mix batter gently until just smooth to prevent gluten development and ensure a light, crispy cone.
- Properly heat and evenly pour batter into the waffle cone maker for uniform baking.
- Shape cones immediately around molds while hot, working quickly to prevent brittleness.
- Cool cones completely on a wire rack before storage to maintain crispness and prevent sogginess.
- Store in an airtight container, handle with care, and reheat briefly for optimal texture and freshness.
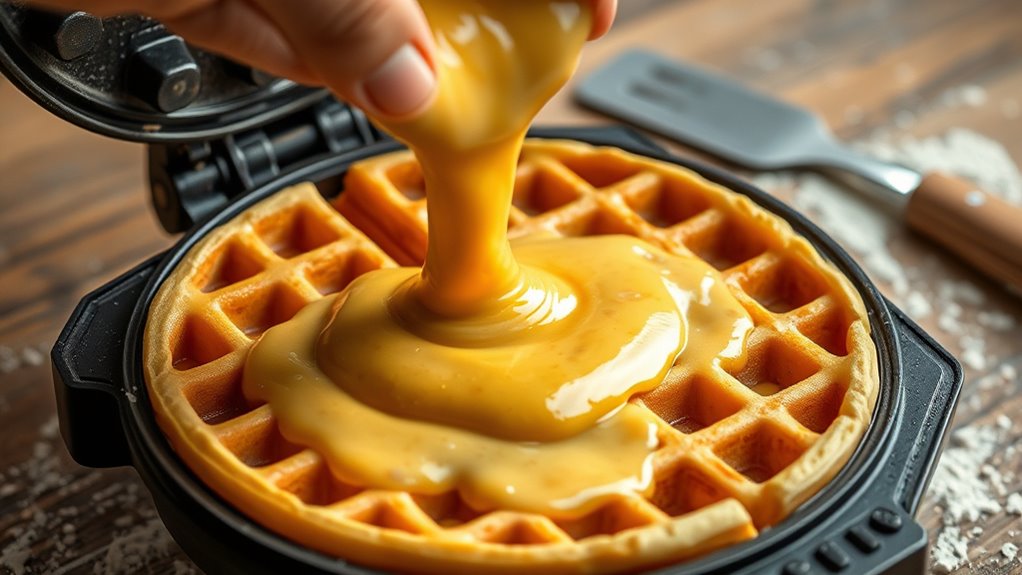
Making perfect waffle cones starts with understanding the right batter and shaping techniques. The foundation of a crisp, flavorful cone lies in how you mix the ingredients and how you handle the batter afterward. When it comes to mixing techniques, you want to combine your ingredients just until smooth. Overmixing can develop gluten in the flour, resulting in a chewy texture instead of the desired crispness. Use a gentle folding method, mixing in small circles until all components are evenly incorporated. This approach guarantees your batter remains light and airy, which is vital for a delicate cone.
Mix ingredients gently until smooth to keep batter light and achieve crispy waffle cones.
Once your batter is mixed properly, it’s important to consider storage tips to maintain its quality before baking. If you’re preparing the batter in advance, transfer it to an airtight container and refrigerate. Keeping it cold slows down fermentation and prevents the batter from becoming too runny or developing a skin on top. Before using refrigerated batter, give it a gentle stir to re-incorporate any separation that might have occurred. If you notice any lumps or dryness after refrigeration, a quick whisk can smooth it out without overmixing. Avoid freezing batter, as it can alter the texture and make it difficult to work with later, leading to uneven baking.
Temperature control is also key. Always heat your waffle cone maker thoroughly before pouring the batter. A hot surface guarantees the batter cooks quickly and evenly, creating those characteristic thin, crisp cones. When pouring, use a ladle or measuring cup to distribute the batter uniformly, avoiding thick spots that can cause uneven shaping or sogginess. As the batter cooks, you’ll notice it bubbles and turns golden brown—this is your cue to gently lift and shape the cone. If the batter sticks or is too soft, it might be undercooked or the temperature might not be high enough; adjusting the heat helps achieve the perfect crispness and flexibility needed for shaping.
Handling the cones during shaping requires a steady hand and a quick motion. Once you lift the cooked batter, shape it around a cone mold or a cone-shaped form immediately. The hot batter cools quickly, so timing is vital. If you wait too long, it becomes brittle and difficult to shape. Use a silicone or heat-resistant glove if needed, and work swiftly to wrap the cone around the form, pressing gently to seal the edge. After shaping, let the cone cool completely on a wire rack before storing or serving. Proper handling and storage tips will help your waffle cones stay crisp and fresh longer, ensuring each bite is as delicious as intended. Additionally, understanding the contrast ratio of your ingredients can influence the texture and appearance of the final cone, making precise measurements essential.
Frequently Asked Questions
Can Waffle Cone Batter Be Made Gluten-Free?
Yes, you can make waffle cone batter gluten-free. You just need to explore gluten-free options and ingredient substitutions, like using almond flour or gluten-free all-purpose flour. Be sure to adjust the liquid content so the batter remains smooth and pourable. By choosing the right gluten-free ingredients, you’ll get delicious cones that everyone can enjoy, even those with gluten sensitivities.
How Long Can Waffle Cone Batter Be Stored?
You can store waffle cone batter for up to 24 hours in the refrigerator, but proper batter preservation is key. Use an airtight container to prevent it from drying out or absorbing odors. Make sure to cover it well and keep it chilled. When you’re ready to use it, give the batter a quick stir. Follow these storage tips to maintain batter quality and ensure your waffles turn out perfect every time.
What Are Alternative Shaping Methods for Cones?
You can explore alternative molding techniques for shaping cones using various cone shaping tools. Instead of traditional methods, try silicone molds or custom-shaped forms that help maintain consistent shape and size. You might also use metal or wooden molds designed specifically for cone shaping. These tools make it easier to achieve uniform cones and can be especially useful if you’re making large batches or want unique designs.
How Do I Prevent Cracks in My Waffle Cones?
Imagine you’re in the 1800s, trying to perfect your waffle cone. To prevent cracks, focus on crack prevention techniques like maintaining the right batter consistency—thick enough to hold shape but not too stiff. make certain your batter is well-mixed and rested, which helps prevent air bubbles. Also, avoid overbaking and use moderate heat. These steps will give you smoother, crack-free cones that stand the test of time.
Can Waffle Cone Batter Be Used for Other Desserts?
Absolutely, you can use waffle cone batter for other desserts! Just make certain your batter has the right consistency—thick enough to hold shape but not too stiff. You can experiment with flavor variations like vanilla, cocoa, or spices to suit different treats. Use it to make cookie cups, thin crisps, or even decorative bases. With a bit of creativity, waffle cone batter becomes a versatile base for many sweet creations.
Conclusion
So, now you’re basically a waffle cone wizard. With your newfound knowledge, you can confidently craft perfect batter and shape cones like a pro—because who needs a bakery when you’ve got this guide? Just remember, if your cones wobble or crack, it’s all part of the charm. Embrace your inner waffle artist, and soon enough, you’ll be the hero of every ice cream lover’s dreams—one cone at a time.